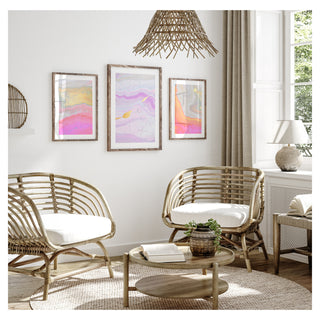
Need help framing your Lia Billie artwork? If yes we've put together a carefully curated guide to assist you, addressing any questions you may have and sparking your creativity along the way. Take a peek at the steps below and let us guide you through the framing process for your artwork.
How to frame art with a mat board
Get ready for a framing adventure that's as fun as it is fabulous! Here's your ultimate guide to framing with mat boards, so you can turn your art into a masterpiece that's bursting with personality.
Step 1: Preparing for Your Creative Mission
Gather your art treasures and embark on this creative journey! Make sure you have a dazzling array of mat boards that come in all colors and sizes. The more, the merrier! Let your imagination run wild as you pick the perfect mat to complement your artwork's personality.
Step 2: The Artistic Dance - Choose Your Match
Now comes the thrilling part – matching your art with the perfect mat! Mix and match colors, experiment with different styles, and see how each mat elevates the artwork's charm. Don't be afraid to get adventurous with funky combinations or stick to classic pairings – it's all about finding the one that sets your art's heart aflutter!
Step 3: Unleash Your Inner Artist
Put on your creative hat and play around with the mat board's size. Go big, go small – the choice is yours! A wide mat creates a grand stage, while a narrow one adds a touch of intimacy. There are no rules here; just let your artistic instincts lead the way.
Step 4: A Bond Like No Other
It's time for your art and mat board to forge an unbreakable bond! Gently attach your artwork to the mat using acid-free tape or embrace the elegance of photo corners. Watch as they come together like long-lost friends, destined to create magic!
Step 5: Into the Frame Wonderland
You've made it this far – now, let's seal the deal! Slide your art and mat board into the picture frame, and voilà! The masterpiece is coming to life before your eyes. Revel in the joy of seeing your creation come together like a puzzle made in artistic heaven.
Step 6: A Moment of Reflection
Step back and admire your handiwork! Your framed art is a true reflection of your creativity and style. Take a moment to appreciate how your choices have transformed your art into a masterpiece that's uniquely you.
Step 7: Showtime!
Your masterpiece is ready for its grand debut! Hang it proudly on your wall, and let your art be the star of the show. Get ready for compliments and awe from friends and family, who will marvel at your artistic prowess!
Remember, this is your artistic adventure, and there are no right or wrong answers – just a world of creativity waiting to be unleashed. So, have a blast as you dive into the art of framing with mat boards.
We can't wait to see how you choose to showcase your Paintmarksonmyjeans print.
Remember to tagg us in your wonderful photos ◡̈
How to frame without mat board
Each Lia Billie print boasts an elegant white border, serving as an exquisite frame to elevate your artwork and make it truly captivating whilst in any frame. This ensures that our artwork looks amazing with or without a matboard
Framing artwork without a mat board is a great option if you want a more minimalist or contemporary look. Here's a step-by-step guide on how to do it:
Materials you'll need:
- Frame: Choose a frame that complements your artwork and fits its dimensions.
- Mounting materials: You can use acid-free adhesive or mounting corners to secure the artwork in place.
- Backing board: A sturdy backing board will protect the artwork and provide support.
- Hanging hardware: Depending on the frame, you might need hanging wire, hooks, or sawtooth hangers.
- Clean cloth and glass cleaner: To clean the glass (if you're using glass).
Step 1: Measure
Measure your artwork to select the right frame size.
Step 2: Assemble
Open the frame, remove any mat board or filler, and use it without the mat board.
Step 3: Clean (optional):
If there's glass, clean it with glass cleaner and a cloth.
Step 4: Mount
Lay the artwork face up, secure it with acid-free adhesive or mounting corners on the backing board.
Step 5: Insert
Carefully place the mounted artwork into the frame, ensuring a snug fit. Use tabs or clips to hold the backing board.
Step 6: Secure
Use clips, tabs, or screws to secure the backing board and artwork in place.
Step 7: Attach hanging hardware
Depending on the frame, attach the right hanging hardware, like wire, sawtooth hangers, or D-rings.
Step 8: Hang:
With the hanging hardware in place, hang the frame on a wall or display it on a flat surface.
By following these steps, you can frame your artwork professionally without a mat board, giving it a clean and modern presentation. Remember to choose appropriate materials, especially acid-free options, to preserve your artwork for years to come.


